iPhone App Development - Augmented Reality

What is it?

Swift is the current language for creating iPhone applications. It works within Apple's Interactive Development Environment (IDE) XCode. It is a combination of visual and programming interfaces.

Why should I learn it?

The world is mobile. While many content applications can function on phone browsers, there are some applications, like games, social media and ecommerce, that need native functionality.

What can I do with it?

You can create the visual interface as well as add code to represent functionality of your application using Swift and XCode. Then you can test and upload to Apple's App Store.

How long will it take?

Learning application development is a different and bit more difficult than creating websites. These tutorials will take several weeks to go through to explain the basic functionality available for application development. But with time and practice, you can master the skills necessary to create functional applications. Beyond iPhone development, there is native Android development and cross-platform options like React Native to consider.

Augmented Reality with Reality Composer

One of the emerging areas of mobile development is augmented reality. This allows you to use a mobile device to place a virtual object in the real world. Like the app Pokemon Go, this type of development lets users interact with their environment.

Using the Reality Composer App

  • Reality Composer is an application that comes with XCode 11. There is also a Reality Composer iPhone app that lets you work on animations on your mobile device before moving them to XCode. To use the Reality Composer App on your iPhone, download it to your iPhone or iPad from the App Store. You can create a new project (+ sign). To add an Object, click the + sign to select one. You can move and size the Object on the scene. The Settings icon has options for how the Object will act in the enviroment, depending on what you have selected.
  • Under the three dots menu, you can find Behaviors that allow you to set up what the object will do on the screen, like a Tap & Flip. Play with these varous options. To test them, choose AR to see them live, and hit the play button to start the Behaviors.
  • This animation can be exported (find Export under the three dots menu) as a .reality file (transfer it via AirDrop to your computer), which can be imported into Reality Composer and used in an XCode Project.
  • Reality Composer with XCode

  • To use Reality Composer with XCode, you will need an Apple Developer Account. Create an Apple Developer account at developer.apple.com. If you already have an Apple ID, use that to begin the process to login and accept the terms. If you don't have an Apple ID, choose Create Yours Now.
  • You will start a New Project (File, New Project). Choose the Augmented Reality App template.
  • Give your product a name. Under Team, click “Add Account”, and after you add your Apple Developer credentials, close out of that window and go back to the new project options. Now, you should be able to add your name under the Team name. Make sure the language is Swift and the User Interface is Storyboard. Save the project.
  • Depending on the functionality of your application, you may need to choose from the top folder settings, the General panel and un-check the Landscape Left and Landscape Right under “Device Orientation”
  • Once in the XCode Project, you will see the File Manager has a file named Experience.rcproject. Click on that file and on that screen, choose the Open in Reality Composer button. Here you will find all the Reality Composer options, similar to those found in the app. If you run the application now, you will see the box that Reality Composer adds as a default. But we will add something more interesting!
  • From Reality Composer, you can add elements from the scene by choosing the + button at the top. Simply search for an item and drag it onto your 3D world. Once an item is added, you can select it to move it around, rotate it, or change the width, height, or depth in the Properties section on the right. Be sure to check the box that says Physics, Participates so items can interact with each other. For example, you can give items properties of ice, in which case it will slide around. Additionally, if you give an item a collision shape of sphere, it will roll around.
  • When an item is selected, you can also click on “Behaviors” in the top right to add interactions from the user, such as tapping, bouncing, floating and others. To get started, choose the + sign to add a new behavior to the selected object. Adjust the duration, make it float and change the style to "playful".
  • Be sure to remove the default cube that you are given in the template, so it won’t show up in your environment.
  • When you are finished, close out of the Reality Composer, and you will see your scene in XCode.
  • From the main project view, click on the “Signing & Capabilities” menu, and choose your Team name from the dropdown, like so:
  • You may also have to change the Deployment Info Target under General Settings in XCode, to match it to the iOS version of your device to allow you to selct the device for testing when you connect your phone.
  • Plug in your iPhone (must have iOS 13), and you should be prompted on your iPhone to “Trust this computer”. Do so, and you will see it populate as one of the device options at the top of XCode.
  • Choose your device, and press the Play button. After compiling, your new AR app should deploy to your device!
  • When you open the new app, you will get a message to trust the developer. To do this, go to Settings / General / Device Management, and choose your Team. Choose the “Trust Apple Development…” message, and then you will be able to open the app.
  • We made this simple Augmented Reality application without adding any additional code, other than what was already in the View Controller. Obviously, there are more advanced features and coding functionality that can be added to make a comprehensive application.

    Below is my demo of a floating bagel!

    Bring AR into an Existing XCode Project

    In the example above, you begin in XCode with an Augmented Reality App template. But you might want to include an XCode scene in an XCode project. You could go with the Augmented Reality App and just add View Controllers, navigation and code as necessary. Or, if you have an existing project that was started with the Single View App template, you can make the following adjustments to include the Augmented Reality you created with Reality Composer.

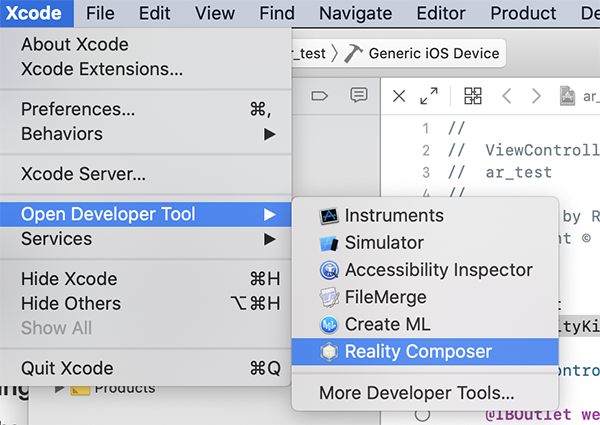
    1. You can work independently in Reality Composer by opening it in XCode Xcode, Open Developer Tool, Reality Composer. Start an new document. Choose an anchor, like Horizontal (will place image on a flat plane). Add objects, behaviors and actions. Get Experience.rcproject from Reality Composer by saving it with that name. Then you can drag it into your XCode project in the Project Manager
    2. In the Storyboard, add Reality AR View from the Library
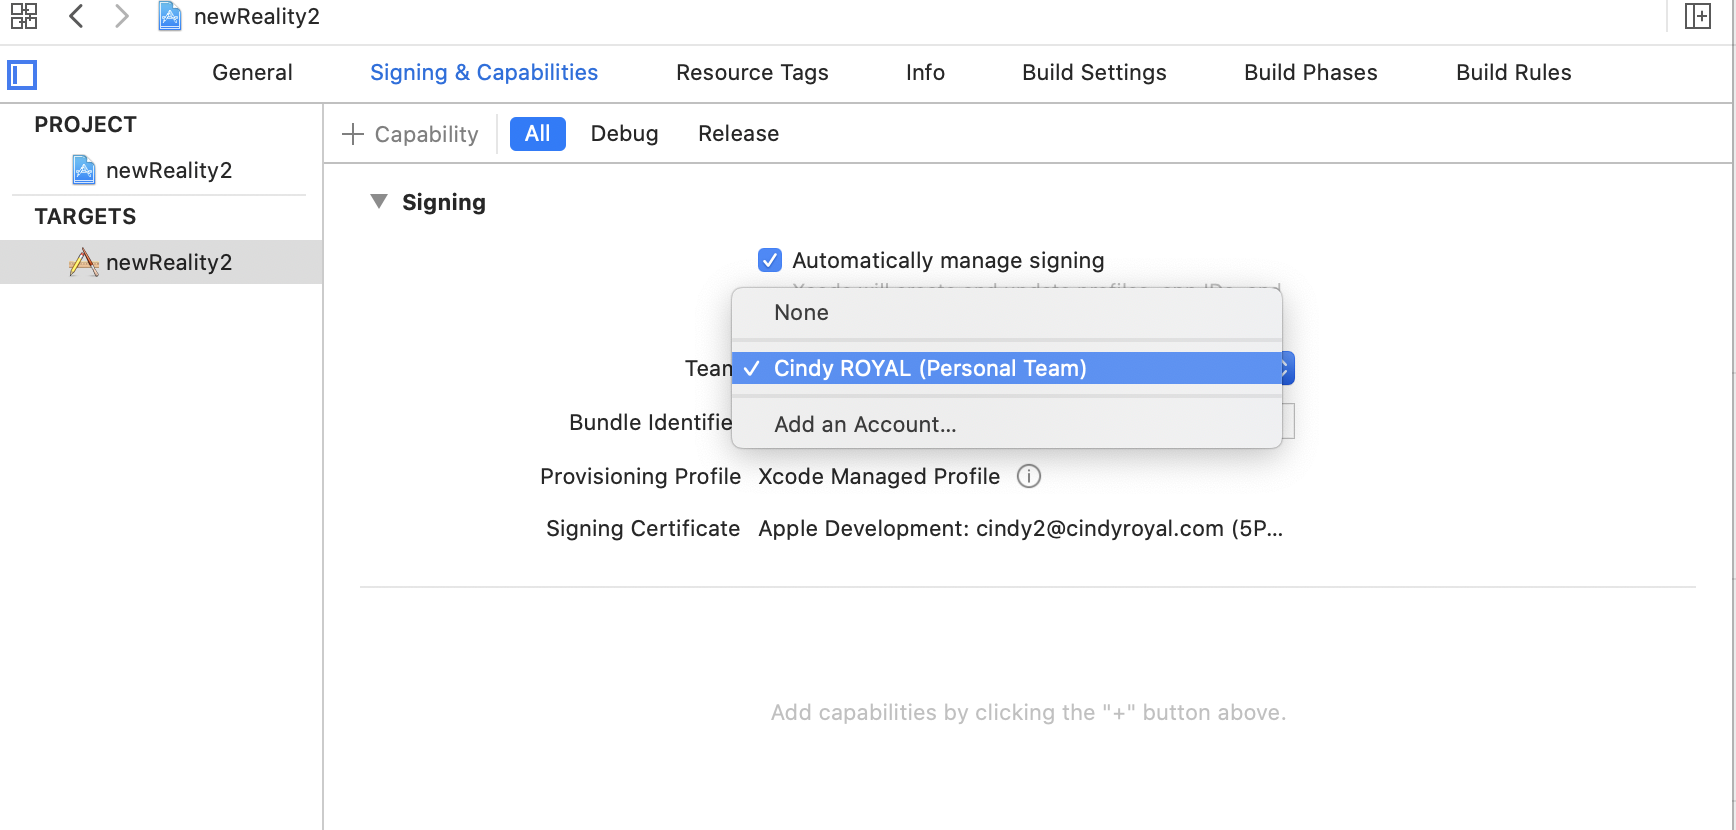
    3. Connect ARView in Storyboard to code as outlet named arView.
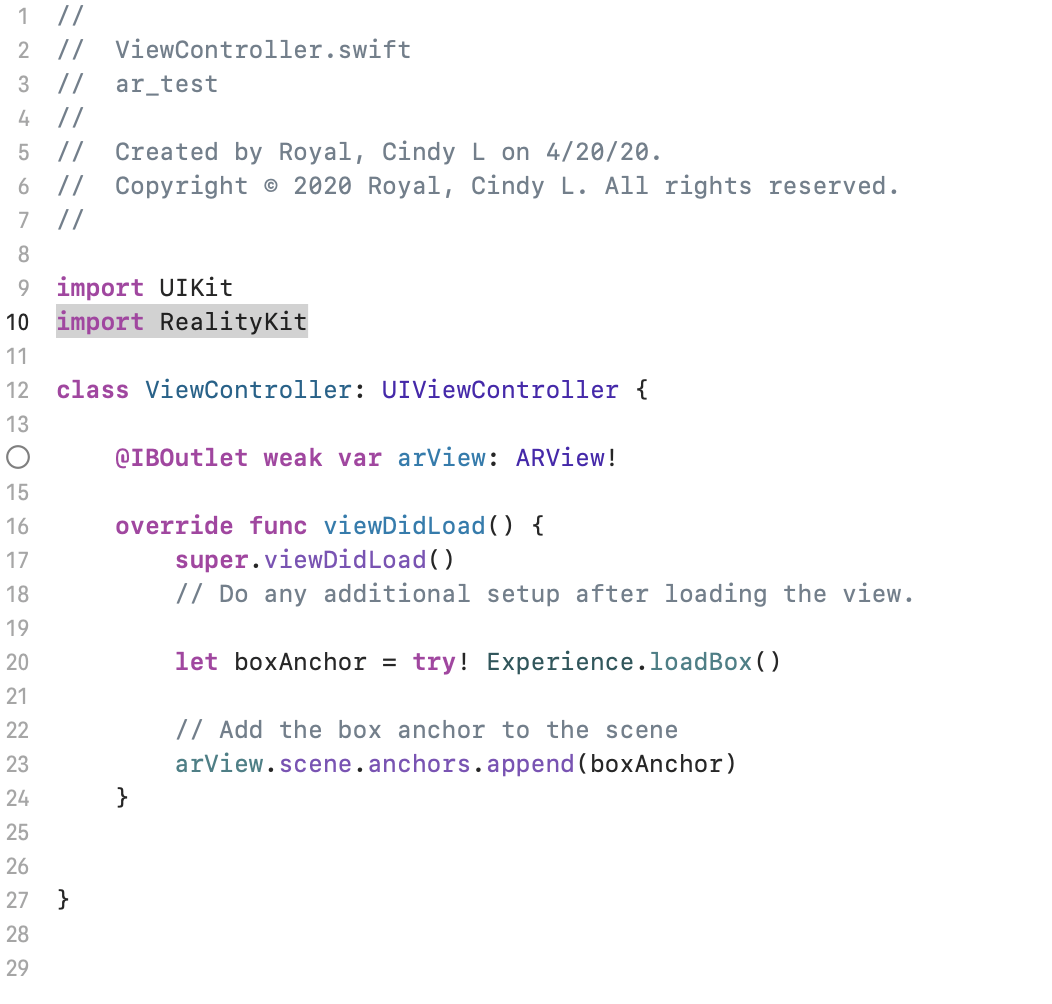
    4. Include the code in the box in ViewController.swift file. There are just a few lines that import Reality Kit and reference the Experience project and the arView
    5. In the Info.plist file, you must Set Camera Usage permission. Next to the top line Information Property List, click the + to add an item. Find Privacy - Camera Usage Description. You must also provide a Description in the value field which will be included in the message on the app that asks the user to grant permission to use the camera.
    6. Now just work on the app as you normally would, adding View Controllers, navigation, code and functionality. Be sure to select the proper screen as the Initial View Controller.
    7. Connect your iPhone to the computer and select it as your device and run the app!

    That's it. These are the steps that are automatically included in an Augmented Reality App template in XCode, but you can easily add them to any project and add AR elements.

    Moving On

    Great job! You used a variety of functions to begin a Augmented Reality application with virtual objects interacting with the real world. There are obviously many more things to learn to make a fully functioning AR app, but this is a brief intro to get you started. Consider how you will use these techniques in your own projects.