
iPhone App Development - Game Exercise
What is it?
Swift is the current language for creating iPhone applications. It works within Apple's Interactive Development Environment (IDE) XCode. It is a combination of visual and programming interfaces.
Why should I learn it?
The world is mobile. While many content applications can function on phone browsers, there are some applications, like games, social media and ecommerce, that need native functionality.
What can I do with it?
You can create the visual interface as well as add code to represent functionality of your application using Swift and XCode. Then you can test and upload to Apple's App Store.
How long will it take?
Learning application development is a different and bit more difficult than creating websites. These tutorials will take several weeks to go through to explain the basic functionality available for application development. But with time and practice, you can master the skills necessary to create functional applications. Beyond iPhone development, there is native Android development and cross-platform options like React Native to consider.
Game Project
Let’s do one more project. We’ll get a little more advanced by creating a game.
Adding Functionality
First, let’s spend a little more time understanding functions.
When you create a function, it is a series of instructions, but they don’t actually execute until you call it. Consider that writing a grocery list is not the same as actually shopping. The list gives you the instructions, but you’d don’t actually buy the groceries until you are at the store. So with a function, the definition is not the execution.
You declare a function using the func keyword. When you set up an Action, XCode creates the func keyword and structure for you. You give the function a name and then parentheses for anything that needs to be passed into the function. The instructions are wrapped in curly braces.
Then you use the name to execute it and provide any required parameters, things you pass into the function that allow it to work.
Same rules hold for variables as functions. Defining a variable is not using it. You can initialize it, assign it. But it doesn’t get used until it is invoked in the code in some manner, as in a formula or when you concatenate a value of variable in a string using the backslash and enclosing in parentheses.
For example: myLabel.text = "Hello \(name)"Start the Game Project
Now we are going to set up a fun little game. We are going to create two buttons. The buttons will represent an Alien or a Predator (of course, you can have them say anything you want). Each will add a different amount of points to the score.
As we have done with the previous exercises, start a new project in XCode called Game as a Single View Application. Set up your editor to have the Storyboard and ViewController visible. (Find them in Project Navigator. Use the option key to open ViewController in same window as Storyboard. Reduce the left pane of the Storyboard, if necessary, using the Visibility icon)
Add a label to the Storyboard. This will hold the Score. Connect it to the code as an Outlet and call it myScore. The code created in the View Controller will appear as it does on the right. You can change the Label's text to "Score".
Alien Button
Let’s set up the Alien button. We’ll add some basic functionality, then we’ll make it more interactive.
Add a button to the Storyboard. Give it Alien as text. Connect it up as an Action. Call it myAlien.
You can now add functionality to this button in the function.
Let’s initialize a variable to hold the score. Put this in the main area where variables are being created.
Then in the method for the Alien button, add the code to the right.
What this does is adds one point to the score every time we click the Alien button. Run it and try it in the Simulator. Make sure the Score label is big enough to see the entire text.
Predator Button
Create a Predator button on your own in the same way as you did for the Alien button, but have it add 5 points every time it is pressed.
Try it out in the Simulator. You should see the score incrementing by 1 for Alien and 5 for Predator.
Optimize the Code
Big deal, right? That’s just a little math, but you have a functioning app that adds 1 to the score for Alien and 5 for Predator. How can we make this more streamlined, more interesting?
First, since we are doing the exact same thing, except for the amount in each button, we might want to make a method that allows us to pass the value when we call it for each button action.
Create the method didScore in the code. But in the place of a number, we will be adding a variable that will be different when it is called for each button.
For each button, remove the original code, and add a call to this function passing in the desired number of points.
Run the app and test it in the Simulator. You have optimized the code to be able to reuse the instructions in the didScore function, passing the appropriate value.
This does exactly what we had been doing before, except our code is less redundant.
Using Modulo
Let’s add a twist. We want the score to reset at a point when the user doesn’t expect it. They think they are adding points, but suddenly the score resets. Let’s do this whenever the score reaches a number that is divisible by 10. We are using the modulo operator (%), that evaluates the remainder of the mathematical operation. If the modulo is 0, that means the formula has no remainder, so the score is divisible by that number.
In the didScore method, add code to the right (if statement) below the first line after the new score is calculated.
So, if the score is divisible by 10 (meaning when you divide it by 10, the remainder is 0), the score returns to 0.
Getting Name and Length
That’s fun, right? But the user might catch on to it pretty quickly and avoid multiples of 10. Let’s add a variable based on the number of characters in the name that the user inputs and use that for our modulo formula.
Recall where we included a Text Field to ask the user for their name in a previous exercise. On your own, add a myName Text Field, a Name Label (no code) and a Submit button called mySubmit near the top of the Storyboard. Include a label called myGreeting to welcome the user with their name. Also resignFirstResponder to make the keyboard go away after submit in the Button action. See the code to the right.
Initialize the name and chars variables at the top of the ViewController class (not within the function), so they will be accessible throughout the script.
Add the statement to count the number of characters to the mySubmit button function below the first line where the name variable is created from the Text Field.The count property counts the number of characters in the string.
In the if statement, replace the number “10” with the variable “chars”.
Make sure the last line is the line that updates the score label on the interface. The full didScore method should look like the code to the right now.
Run it in the Simulator and see it working!
So, now the game will change depending on the word the user puts in the question. The user will have to figure out quickly how to get the highest score possible without getting reset to 0.
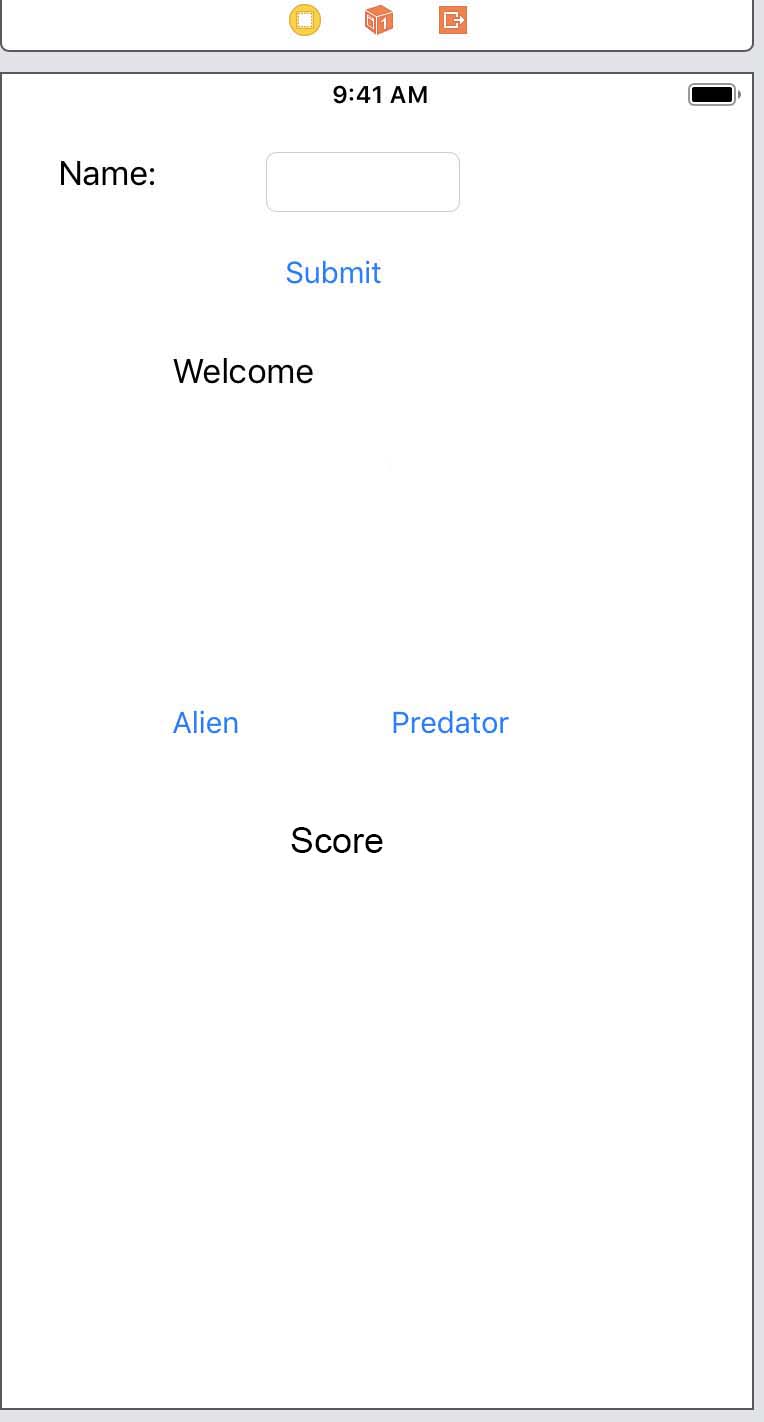
Interface
Your interface should look something like the image to the right.
Random Number
That still might be something the user catches on to, once they figure it out is going by the characters in their name. What if we used a random number for the chars variable instead?
Instead of initializing the chars variable to 0, use the code to the right to create a random integer between 2 and 10. Remove the area in the mySubmit function where you use name.count to get the number of characters, because we are no longer using that.
Try it in the Simulator a few times to see if you can figure out the random number.
Timer
The final thing we can do in this game is to add a timer. I went online to find some examples of using a timer and modified them for this lesson. Maybe we want to see how many points someone can get in 30 seconds, so they don’t have much time to think about the actual algorithm that is resetting it.
We’ll set up two functions, runTimer and updateTimer. We’ll call the runTimer function in both buttons so it starts when the user selects either the Alien or Predator button first. We’ll also add Outlets (drag to the code) to the Alien and Predator buttons called alienButton and predatorButton so that we can implement the hidden feature when the timer is over and show them again when the timer starts on reset (see myReset below). This demonstrates how a button can be both an Action and an Outlet.
Set up Timer Label – create a label for the Timer. Have it say Timer for the text and name it timerLabel.
Initialize variables for counter, timer and isTimerRunning at the top of the script. See variable to the right.
Add runTimer and updateTimer functions to the right to the script:
In the Alien and Predator functions, include the isTimerRunning if statement.
This code will make sure the timer only runs once.
Run the code in the Simulator to see it working.
Note the use of @objc in the updateTimer function. This is needed to use an Objective C function in Swift 4.
Restart Button
You can create a Restart button with the following code on it to allow the user to play again. Drag a button to the Storyboard, hook it up as an Action with the name myReset and give it the following code. This code resets the score, the myScore Label, the timerLabel text, restarts the counter, invalidates the current time, resets the new timer and calculates a new random number.
Moving On
Great job! You used a variety of programming and math functions to achieve a fun game. Consider how you will use these techniques in your own projects. Next we'll look at some design strategies for mobile development.