
First App with XCode and Swift
What is it?
Swift is the current language for creating iPhone applications. It works within Apple's Interactive Development Environment (IDE) XCode. It is a combination of visual and programming interfaces.
Why should I learn it?
The world is mobile. While many content applications can function on phone browsers, there are some applications, like games, social media and ecommerce, that need native functionality.
What can I do with it?
You can create the visual interface as well as add code to represent functionality of your application using Swift and XCode. Then you can test and upload to Apple's App Store.
How long will it take?
Learning application development is a different and bit more difficult than creating websites. These tutorials will take several weeks to go through to explain the basic functionality available for application development. But with time and practice, you can master the skills necessary to create functional applications. Beyond iPhone development, there is native Android development and cross-platform options like React Native to consider.
Hello World
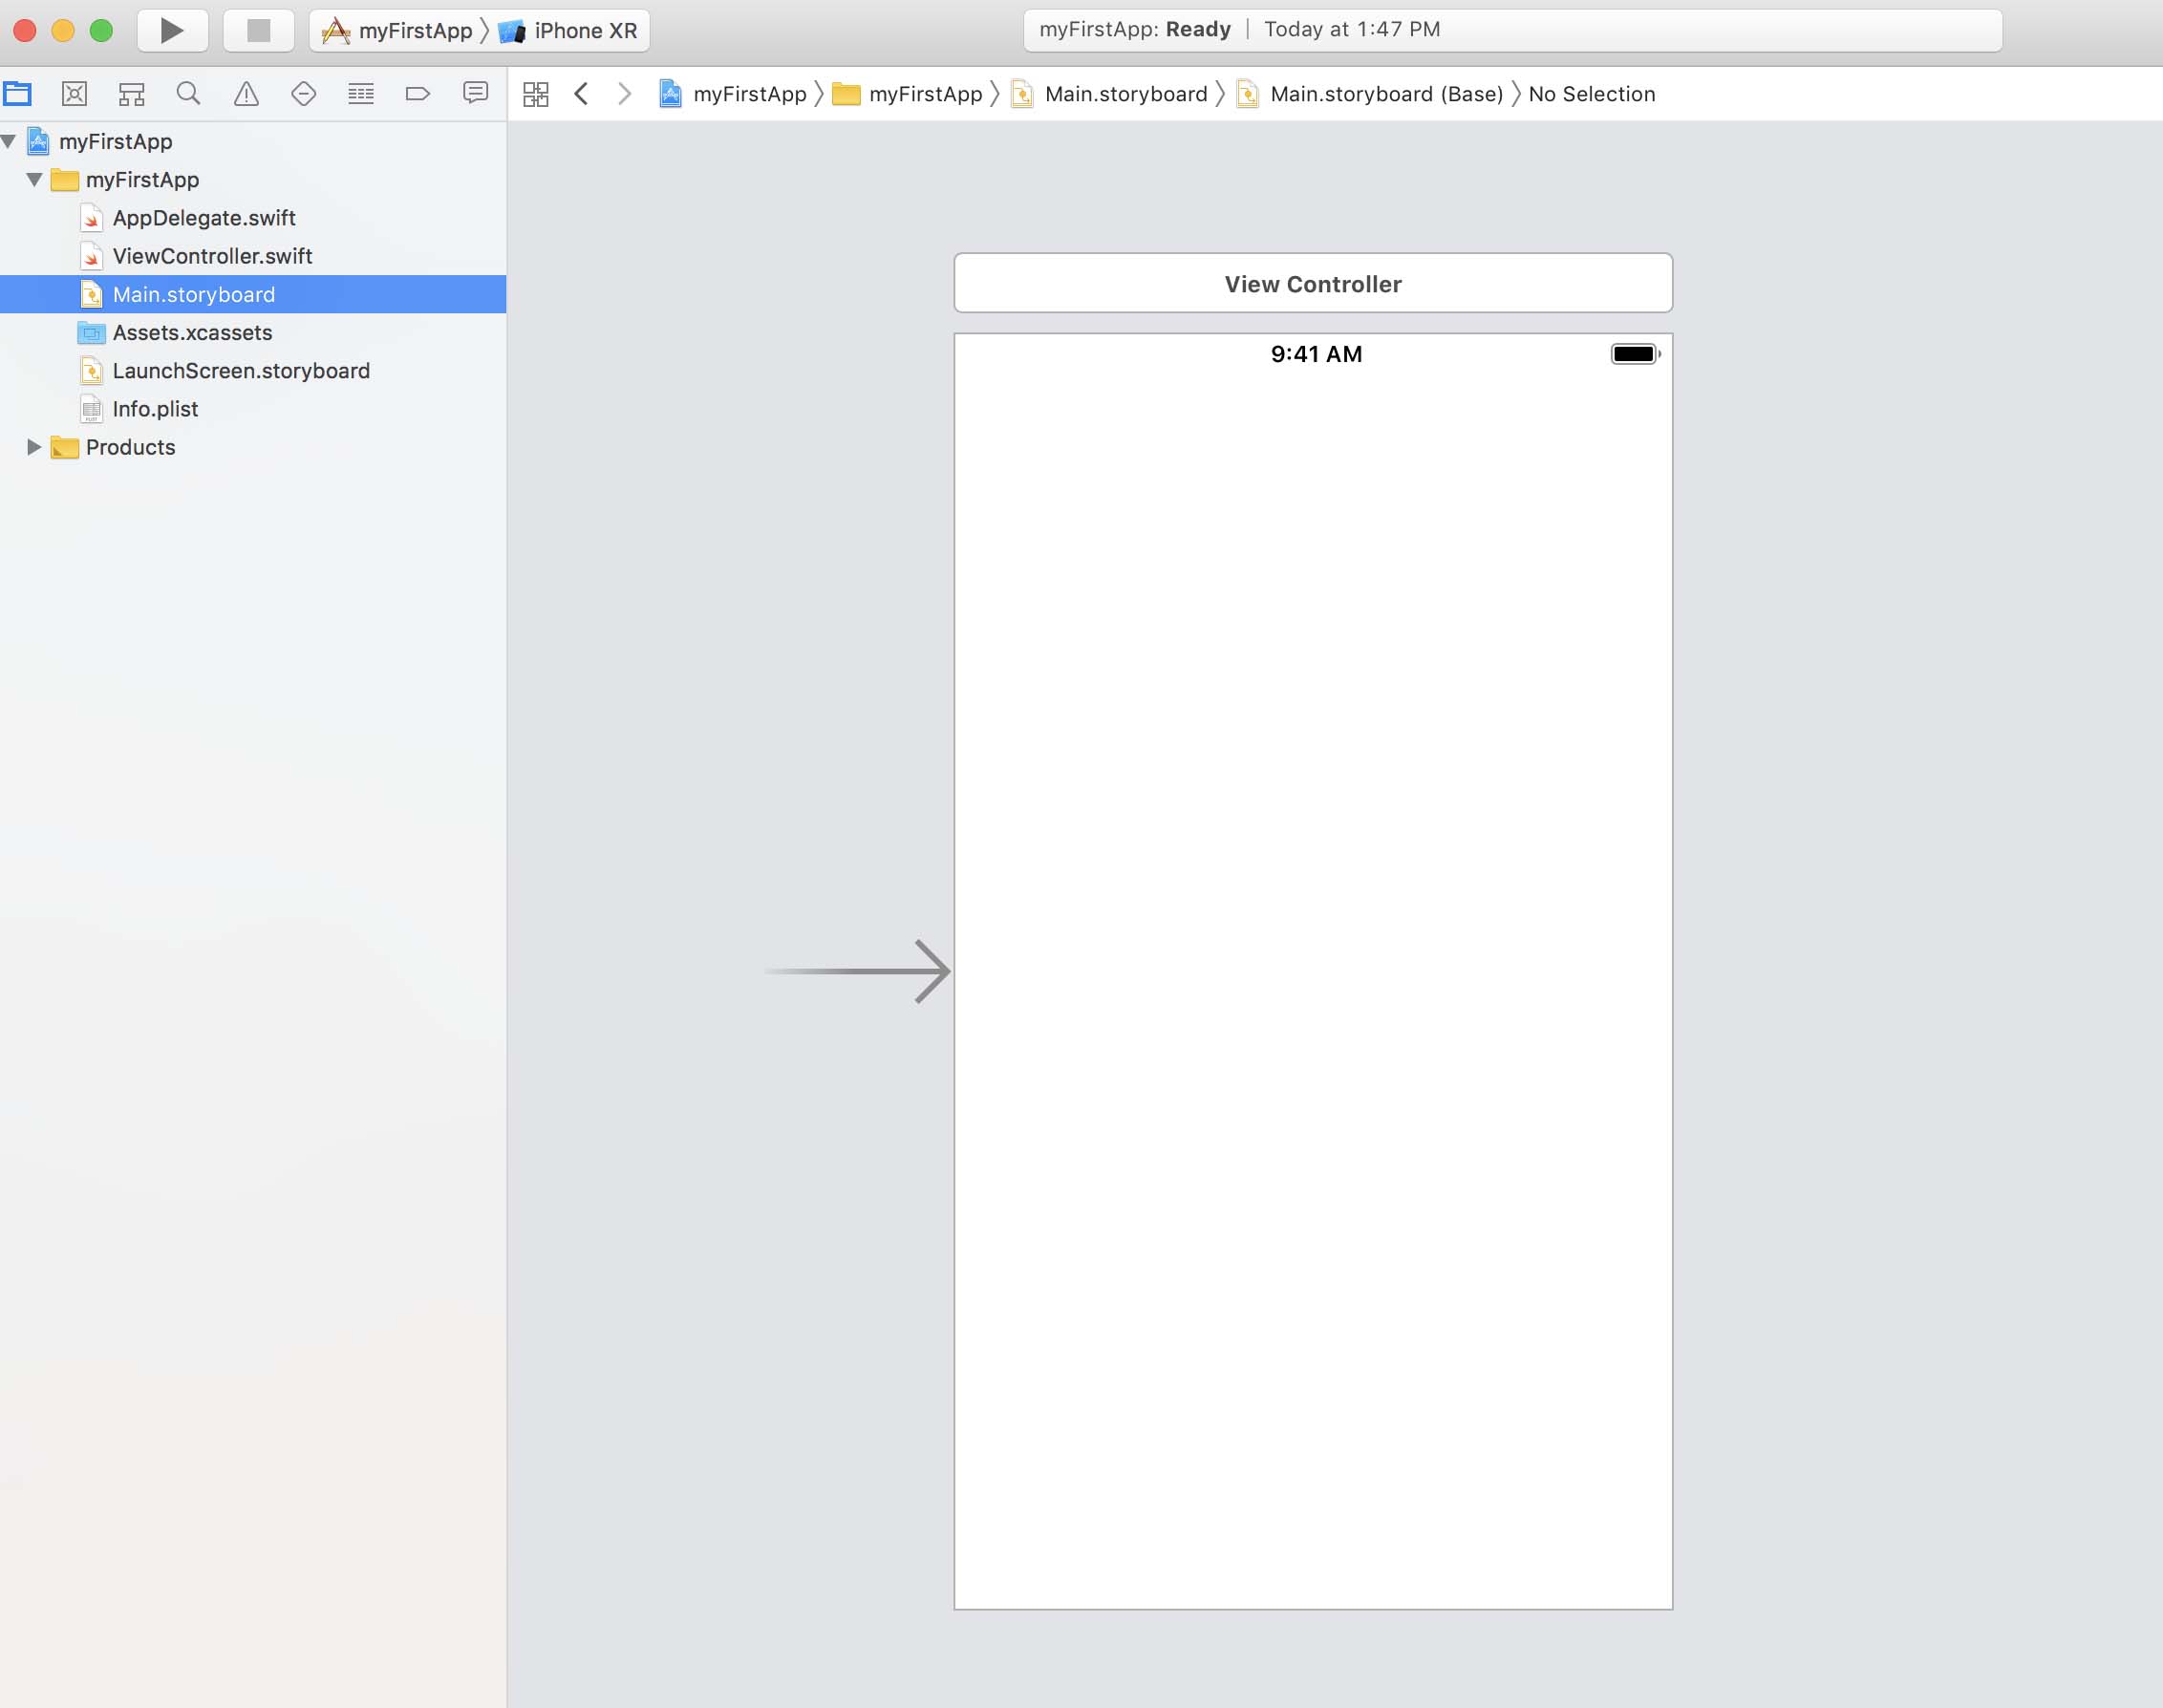
You are already in your first project called MyFirstApp. Before we begin coding, let’s use the Storyboard to add interface elements. You may be in the main preference section of the project. Select Main in the Project Navigator (left sidebar) to open the Storyboard.
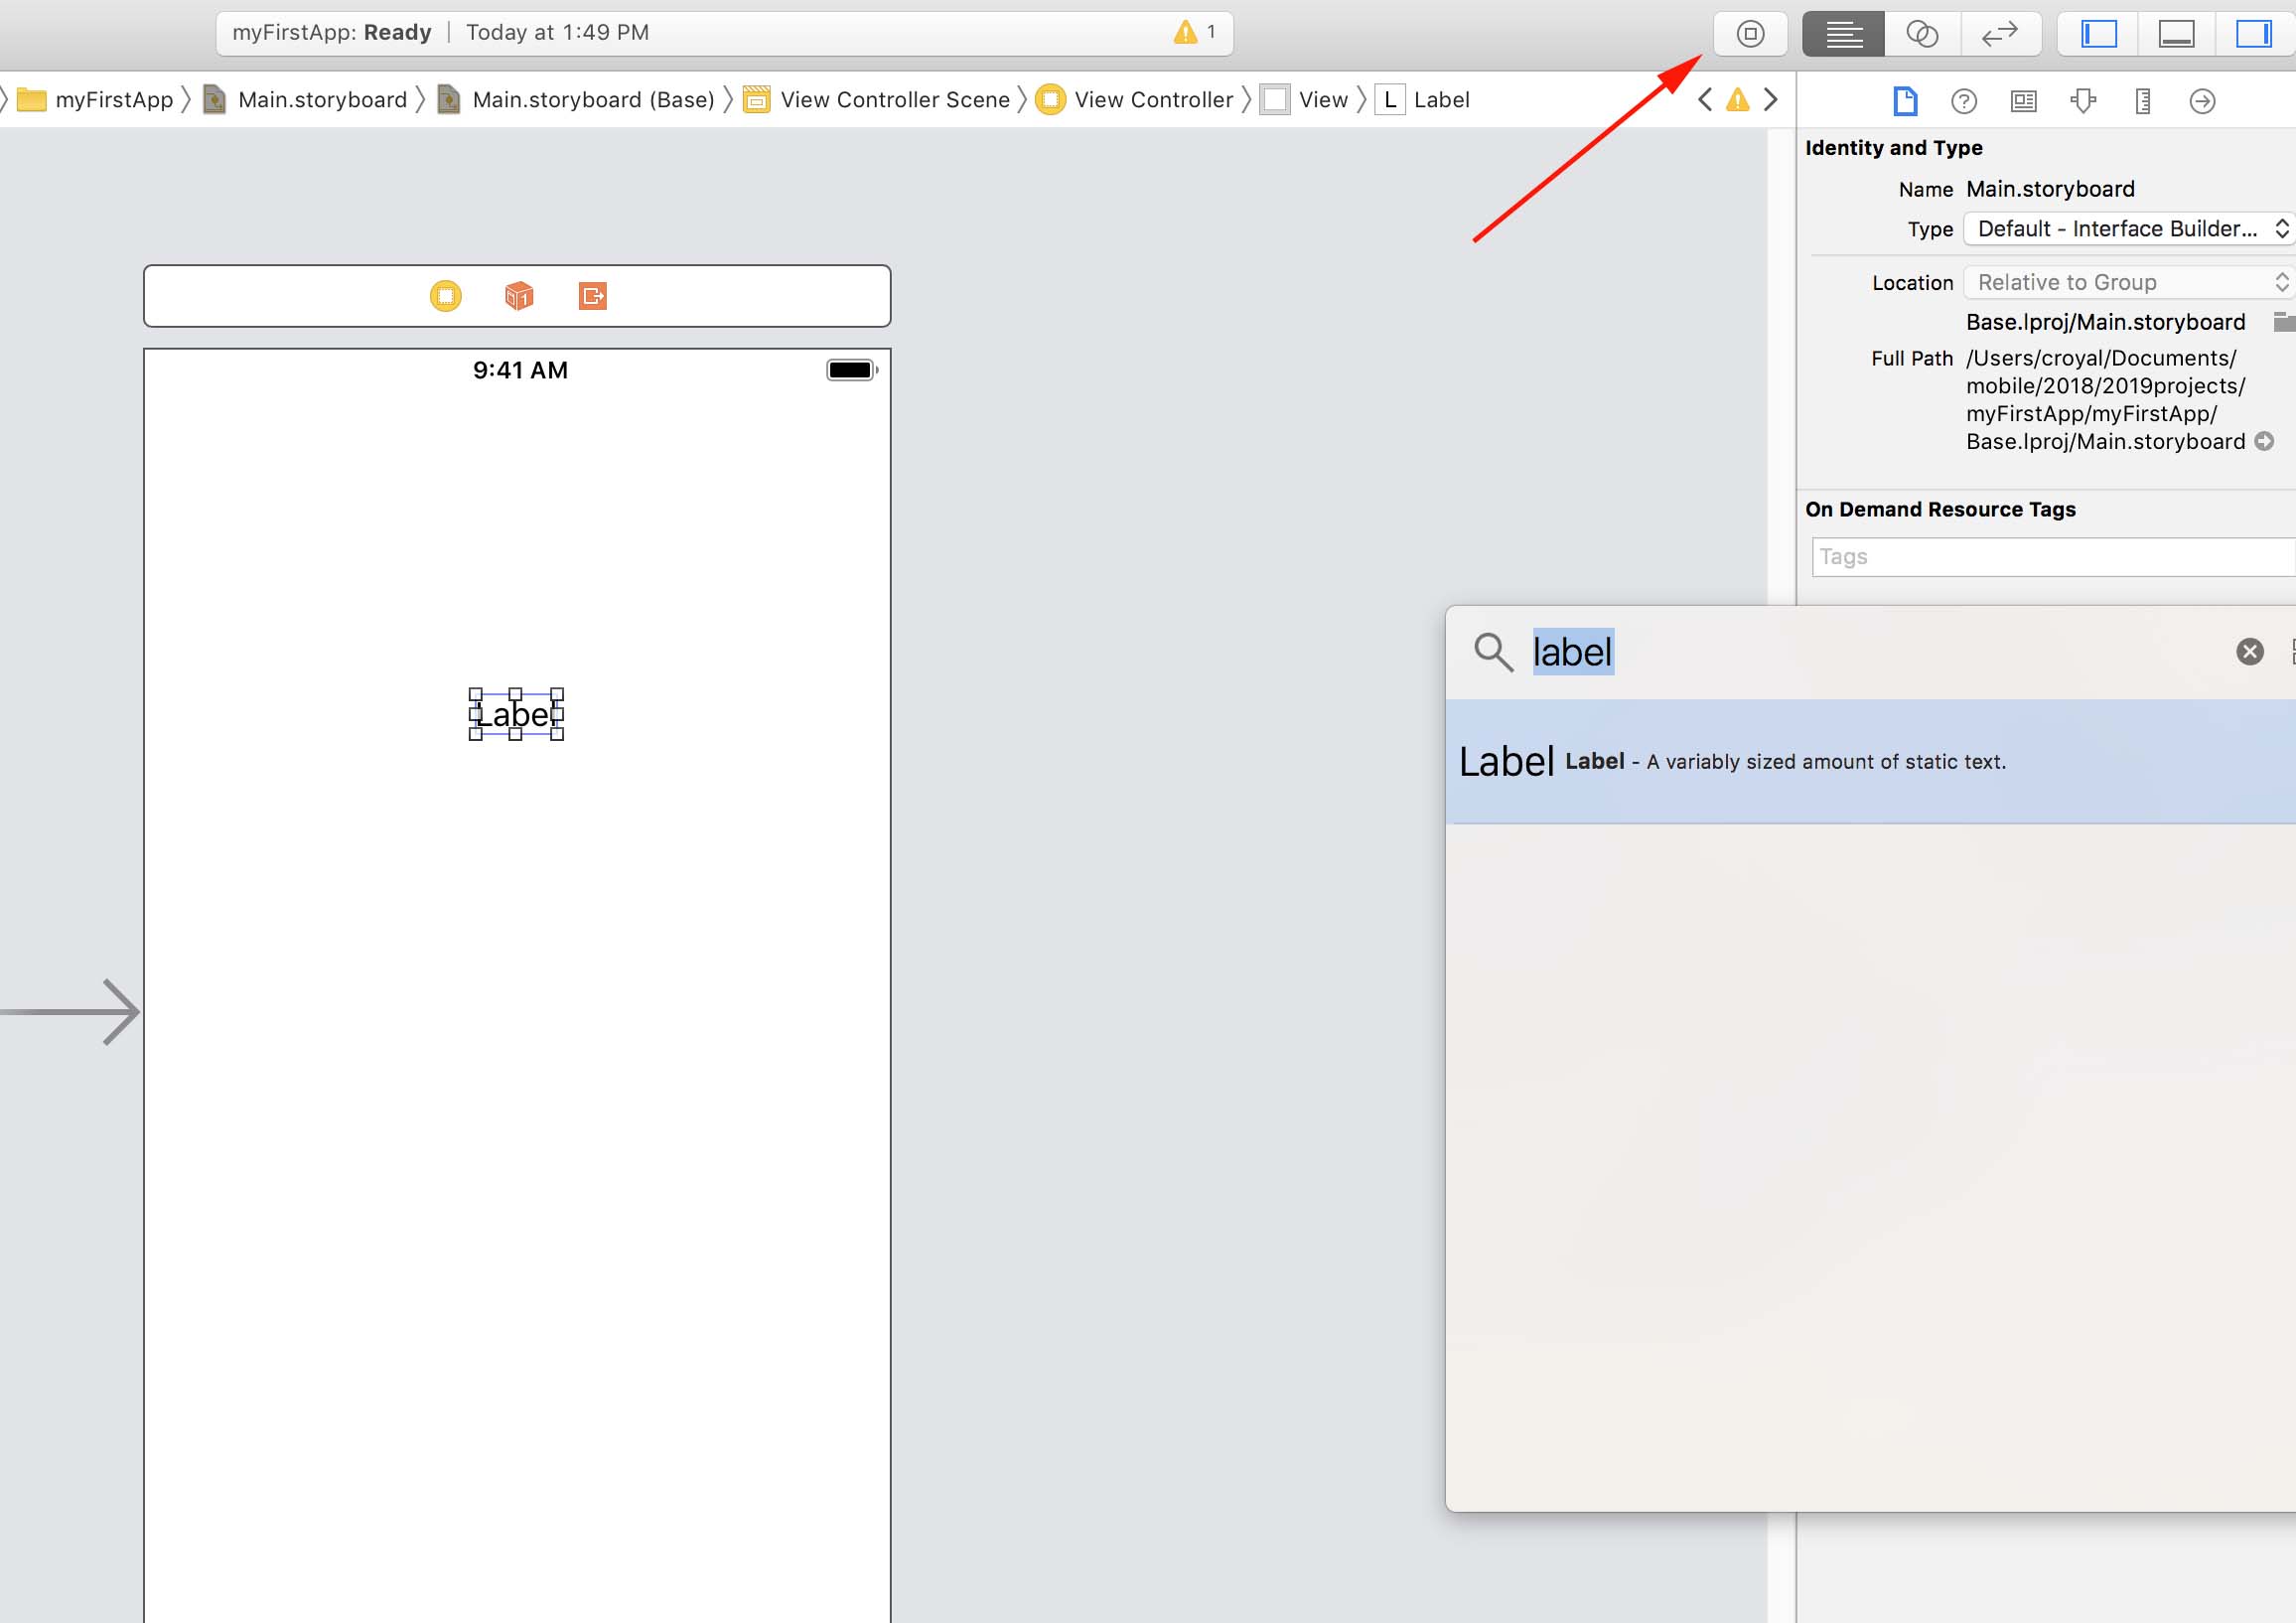
Library Elements
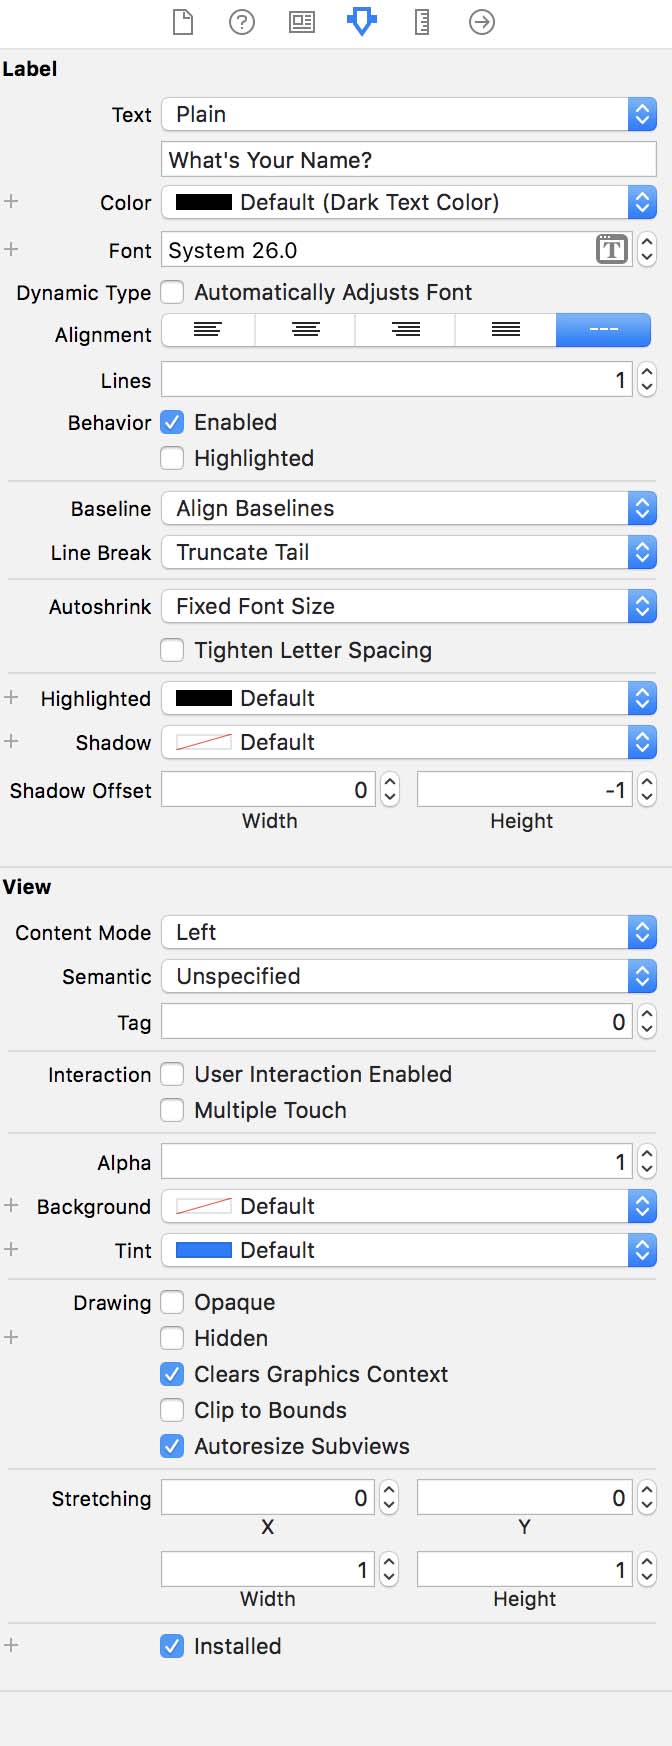
Find the Library Pane (click + sign near top right). There are many user interface elements in the Library. You can use the search field to search for an element. Find a “Label” and drag it on to the Storyboard.
Selecting it once lets you adjust the sizing of the label. Double-clicking lets you change the text. Change the text to say “What’s Your Name?”.
View Controller
Now it’s time to work with some code. You write code in ViewController file, so make sure that is visible in the interface. Use option and select ViewController to see both ViewController and the storyboard in the same window. You may need to Hide Document Outline to the left to make room to see both in the center. You can also click the Assistant Editor button (two circles) to show the code and storyboard.
When you enter the ViewController, notice the following:
import UIKit- using this set of code or library, that's all. You don’t need to change or do anything to it.
class viewController - class declaration, in curly braces, set of variables and functions; properties (or instance variable) and methods. For this exercise, everything will happen within this class. Notice where the curly braces open and close for this class.
Notice also a function automatically created for you.
override func viewDidLoad method - uses func keyword; runs when application loads

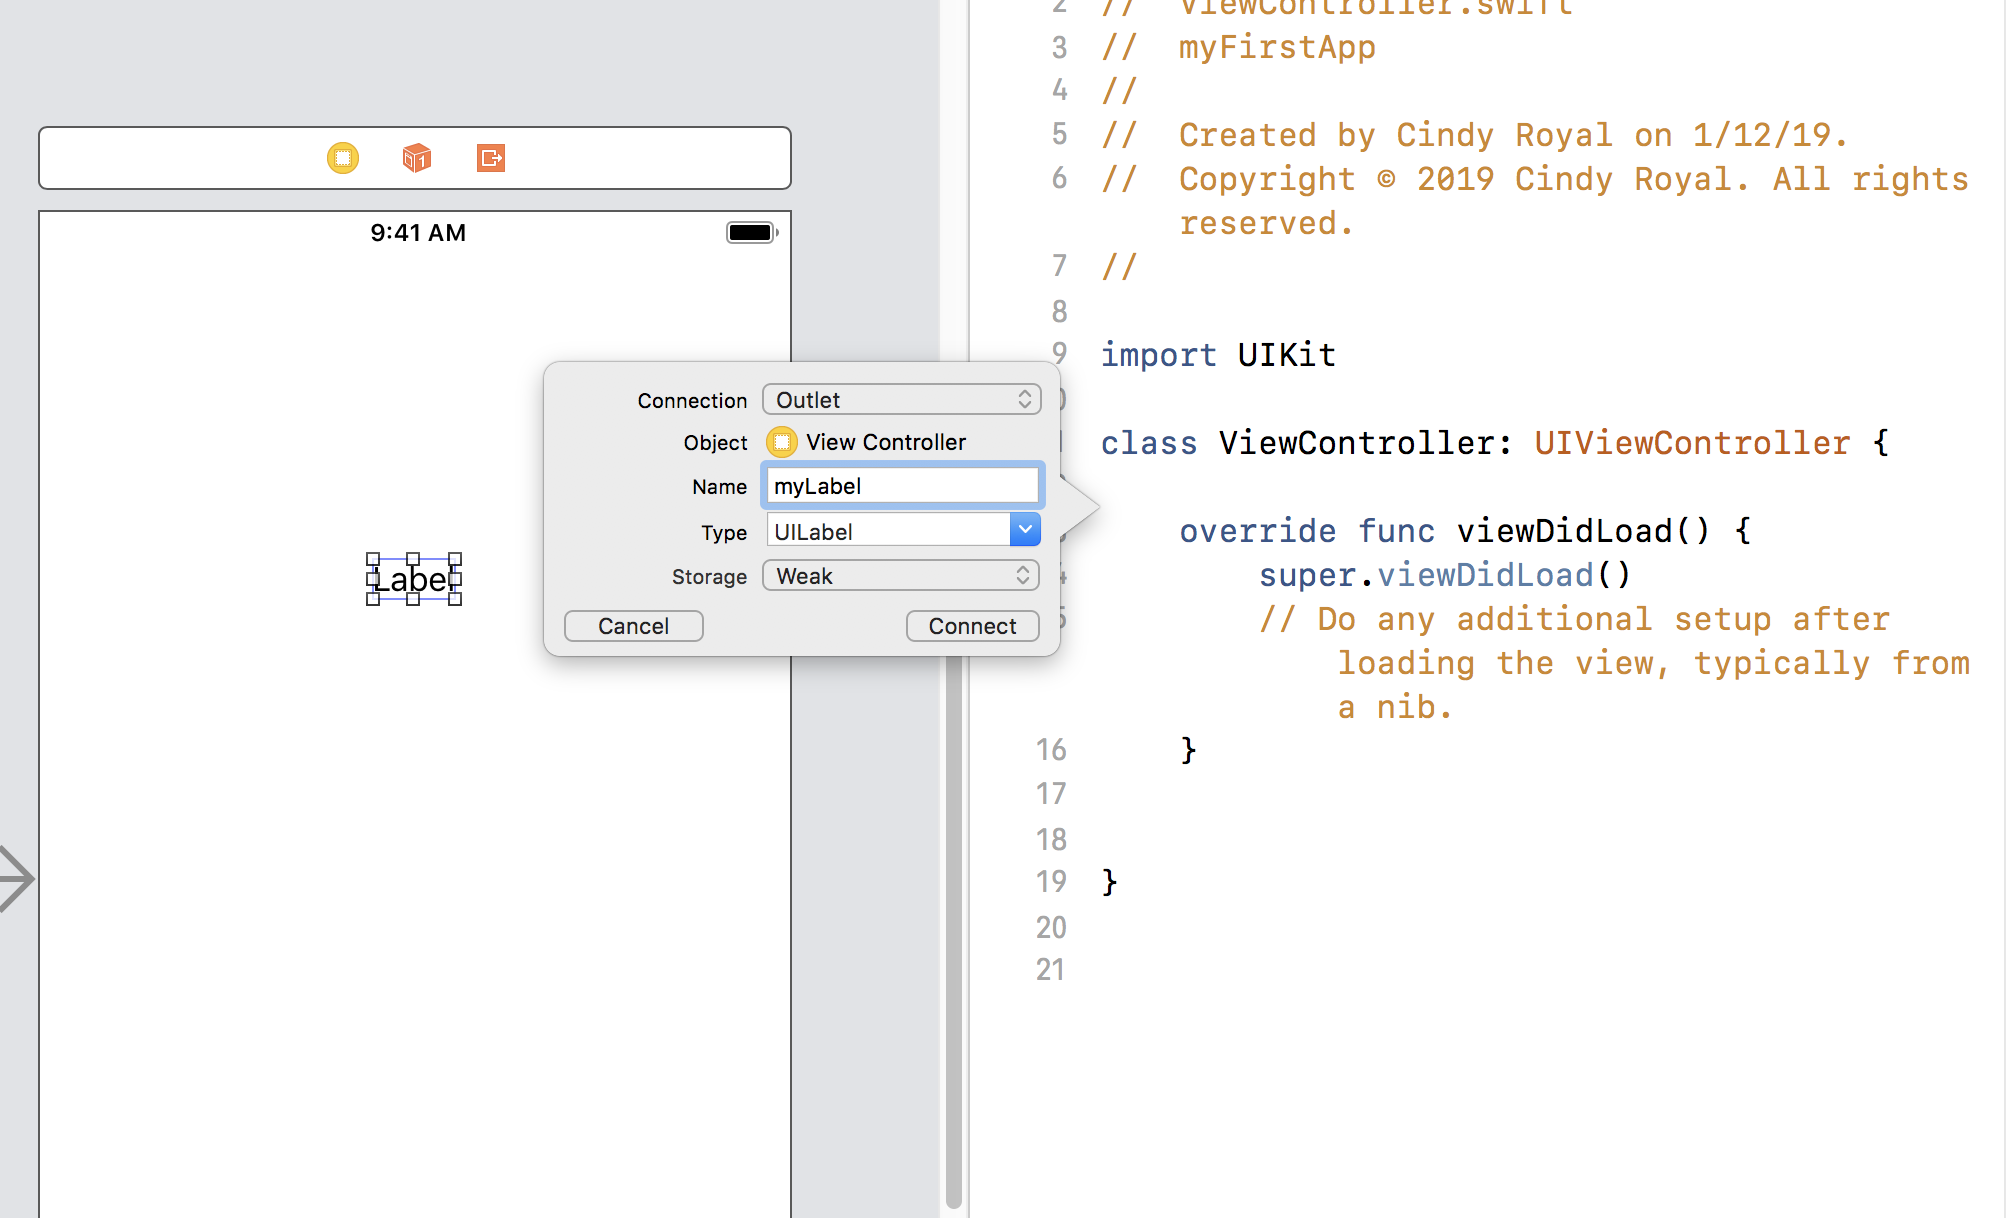
Creating an Outlet
Right click (or ctrl-click) and drag from label you created in the Storyboard into code into the ViewController Section. You will see a blue line. When you let go, you will see the connection box. Create it as an Outlet, give it a name (myLabel), choose UILabel as Type, Weak. Choose Connect. You will see it creating the variable with the label. This creates the variable in the code that can then be used, modified by other items you create.
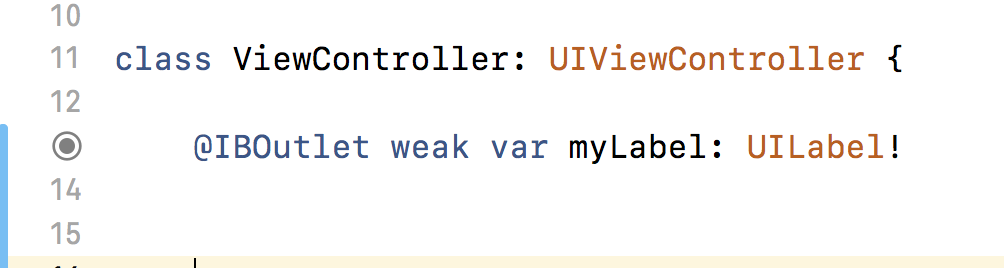
Notice the code created for you when you connected the Label as an Outlet. Also, notice the filled circle next to the declaration, that means the code has a connection. If you don't see a filled circle next to a line of code that should have a connection, you will need to troubleshoot what's missing or what happened.
Change Text on an Outlet
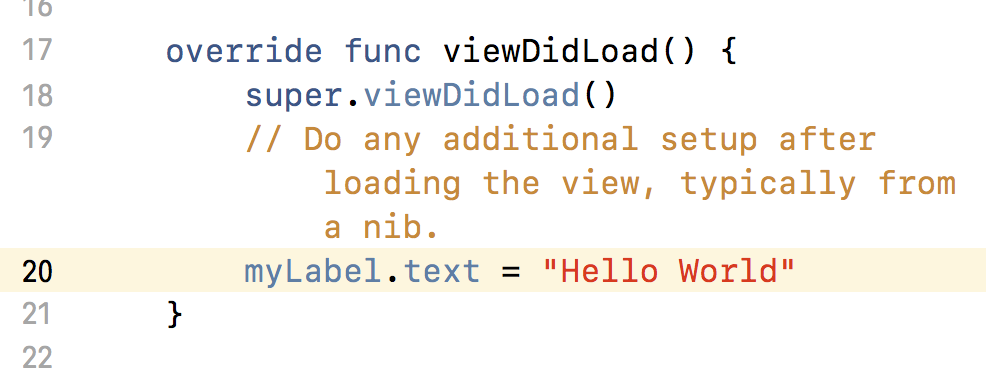
Find the code to the right. In viewDidLoad method, within the curly braces, write the statement to change the text of the label.
"Hello World" is a programming tradition. When starting any new language, learning how to write the string "Hello World" is typically the first lesson. But you can choose any string you want to log to the console.
Run the app. Choose the triangle run button in the top right of the interace. You might have to wait a few seconds to see the result. You can stop the app running back in the XCode interface with the square button.
This is not interactive yet, but you just programmatically changed the label text. You might need to stretch the size of your label to be able to see the whole string.
Instead of “Hello World”, have the text of the label change to “Your Name”. Use your own name.
Run your app again. These lessons demonstrate the role of the viewDidLoad method. It’s what happens when the program loads. It also begins to show you how to programmatically change elements of your interface.
Code Sample - Change Text
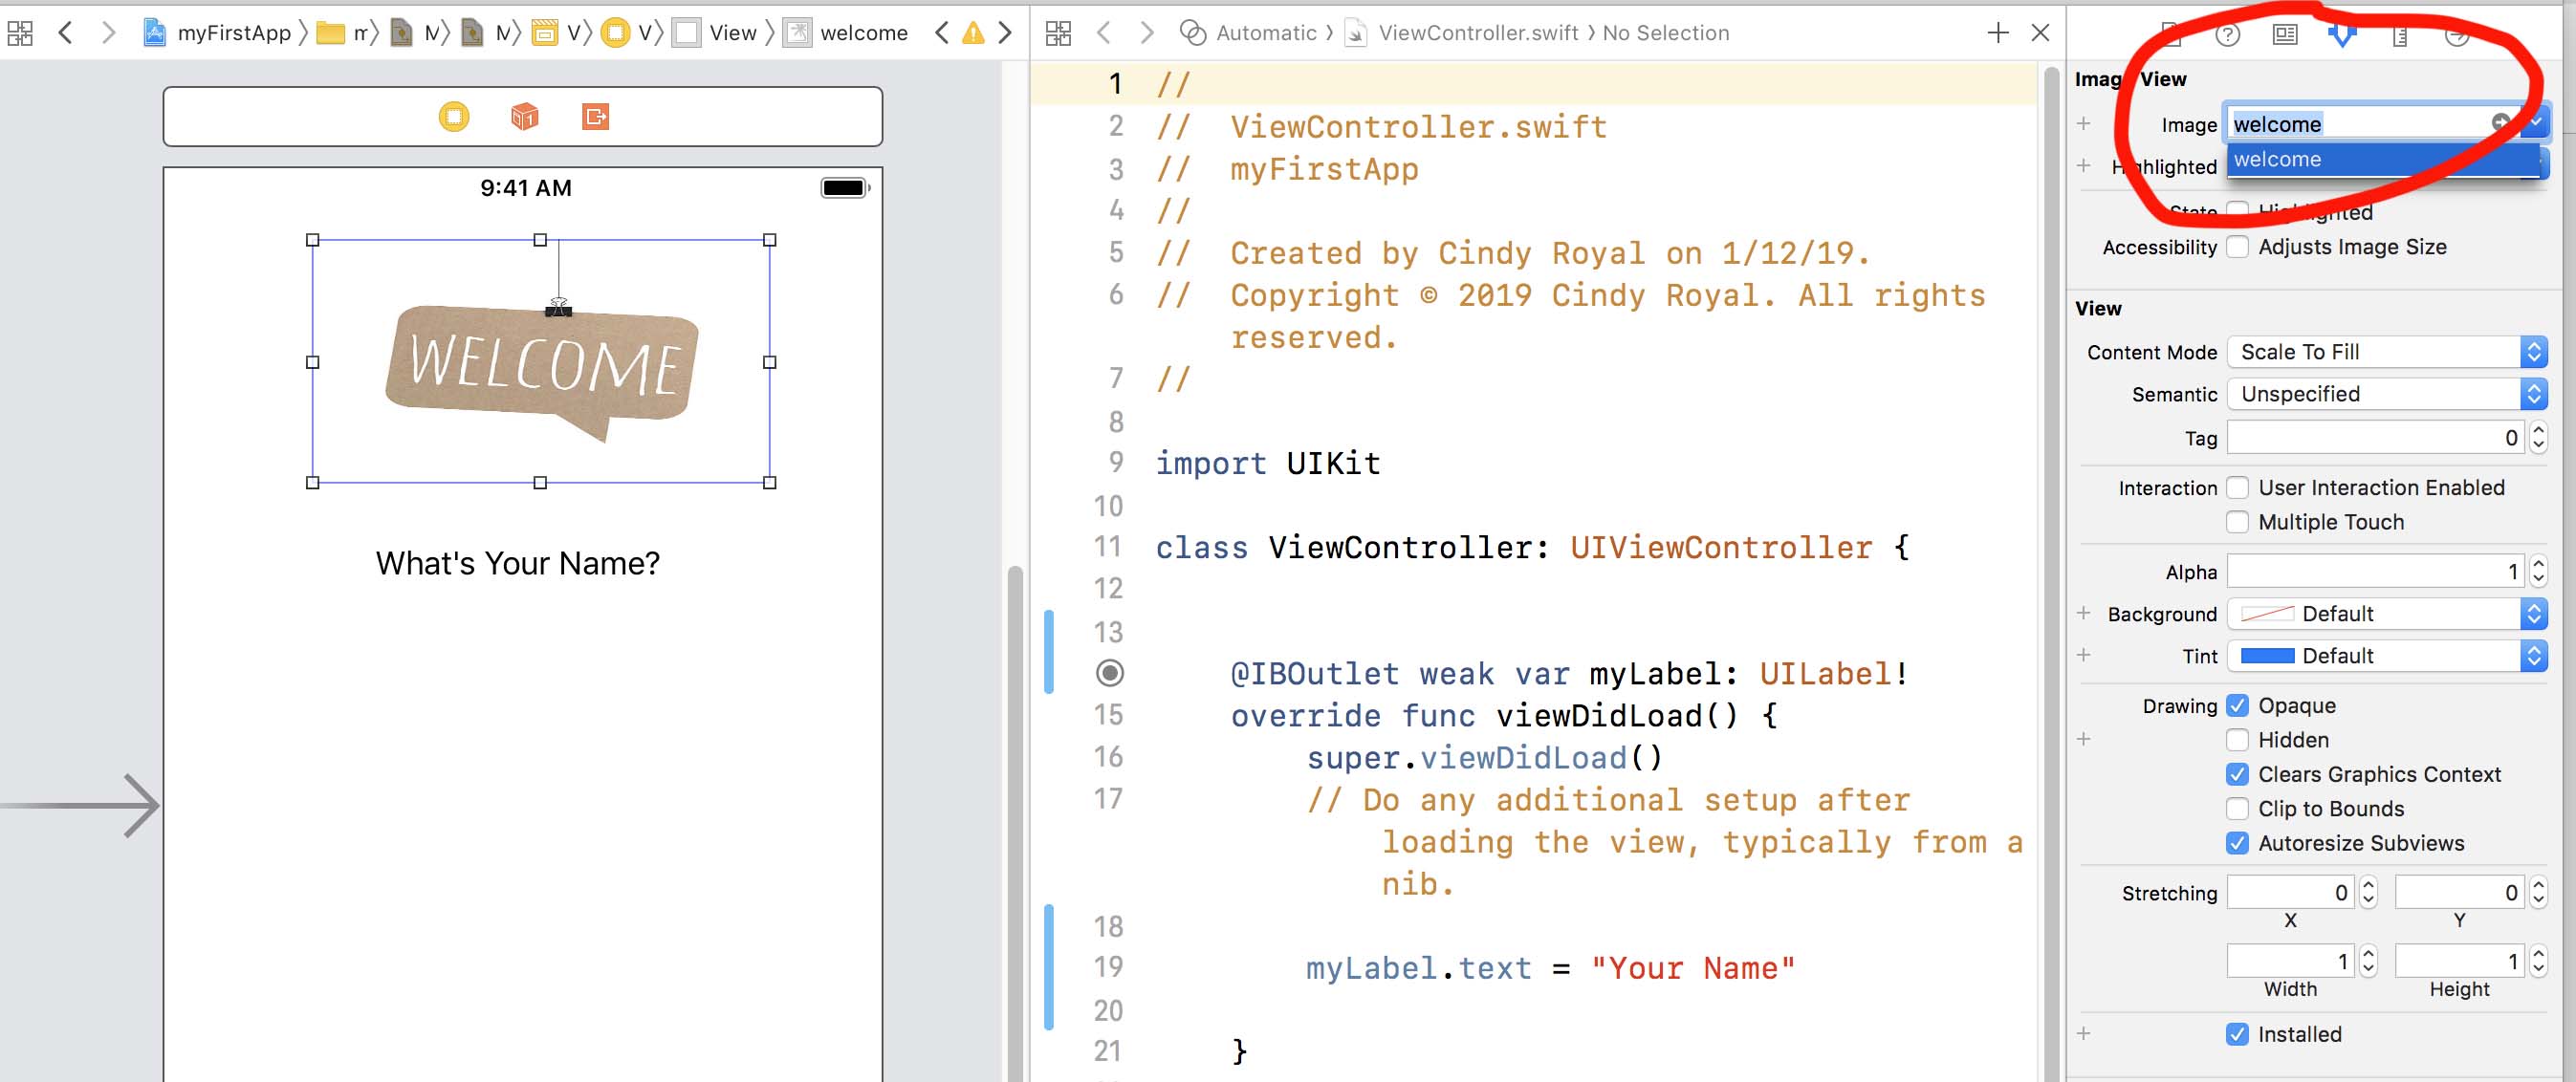
Add an Image
Let’s add an image. You do that by first finding an image you want to include, maybe a photo of yourself or a graphic to represent the app (or just download this Welcome Image). Use your browser to find any image from the Web and download it to your computer (ctrl-click or right click and Save Image As). Save it on your computer in a place where you can easily find it, like Desktop.
In the Project Navigator, pick the folder named Assets.xcassets. Drag your image there. Now it will be available whenever a Utility has an image attribute.
Go back to the Storyboard. Search the Library for an Image View and drag that to the screen. You can then pick the image from the Utilities area with the Attributes Inspector (icon with arrows). Size that image appropriately for the screen.
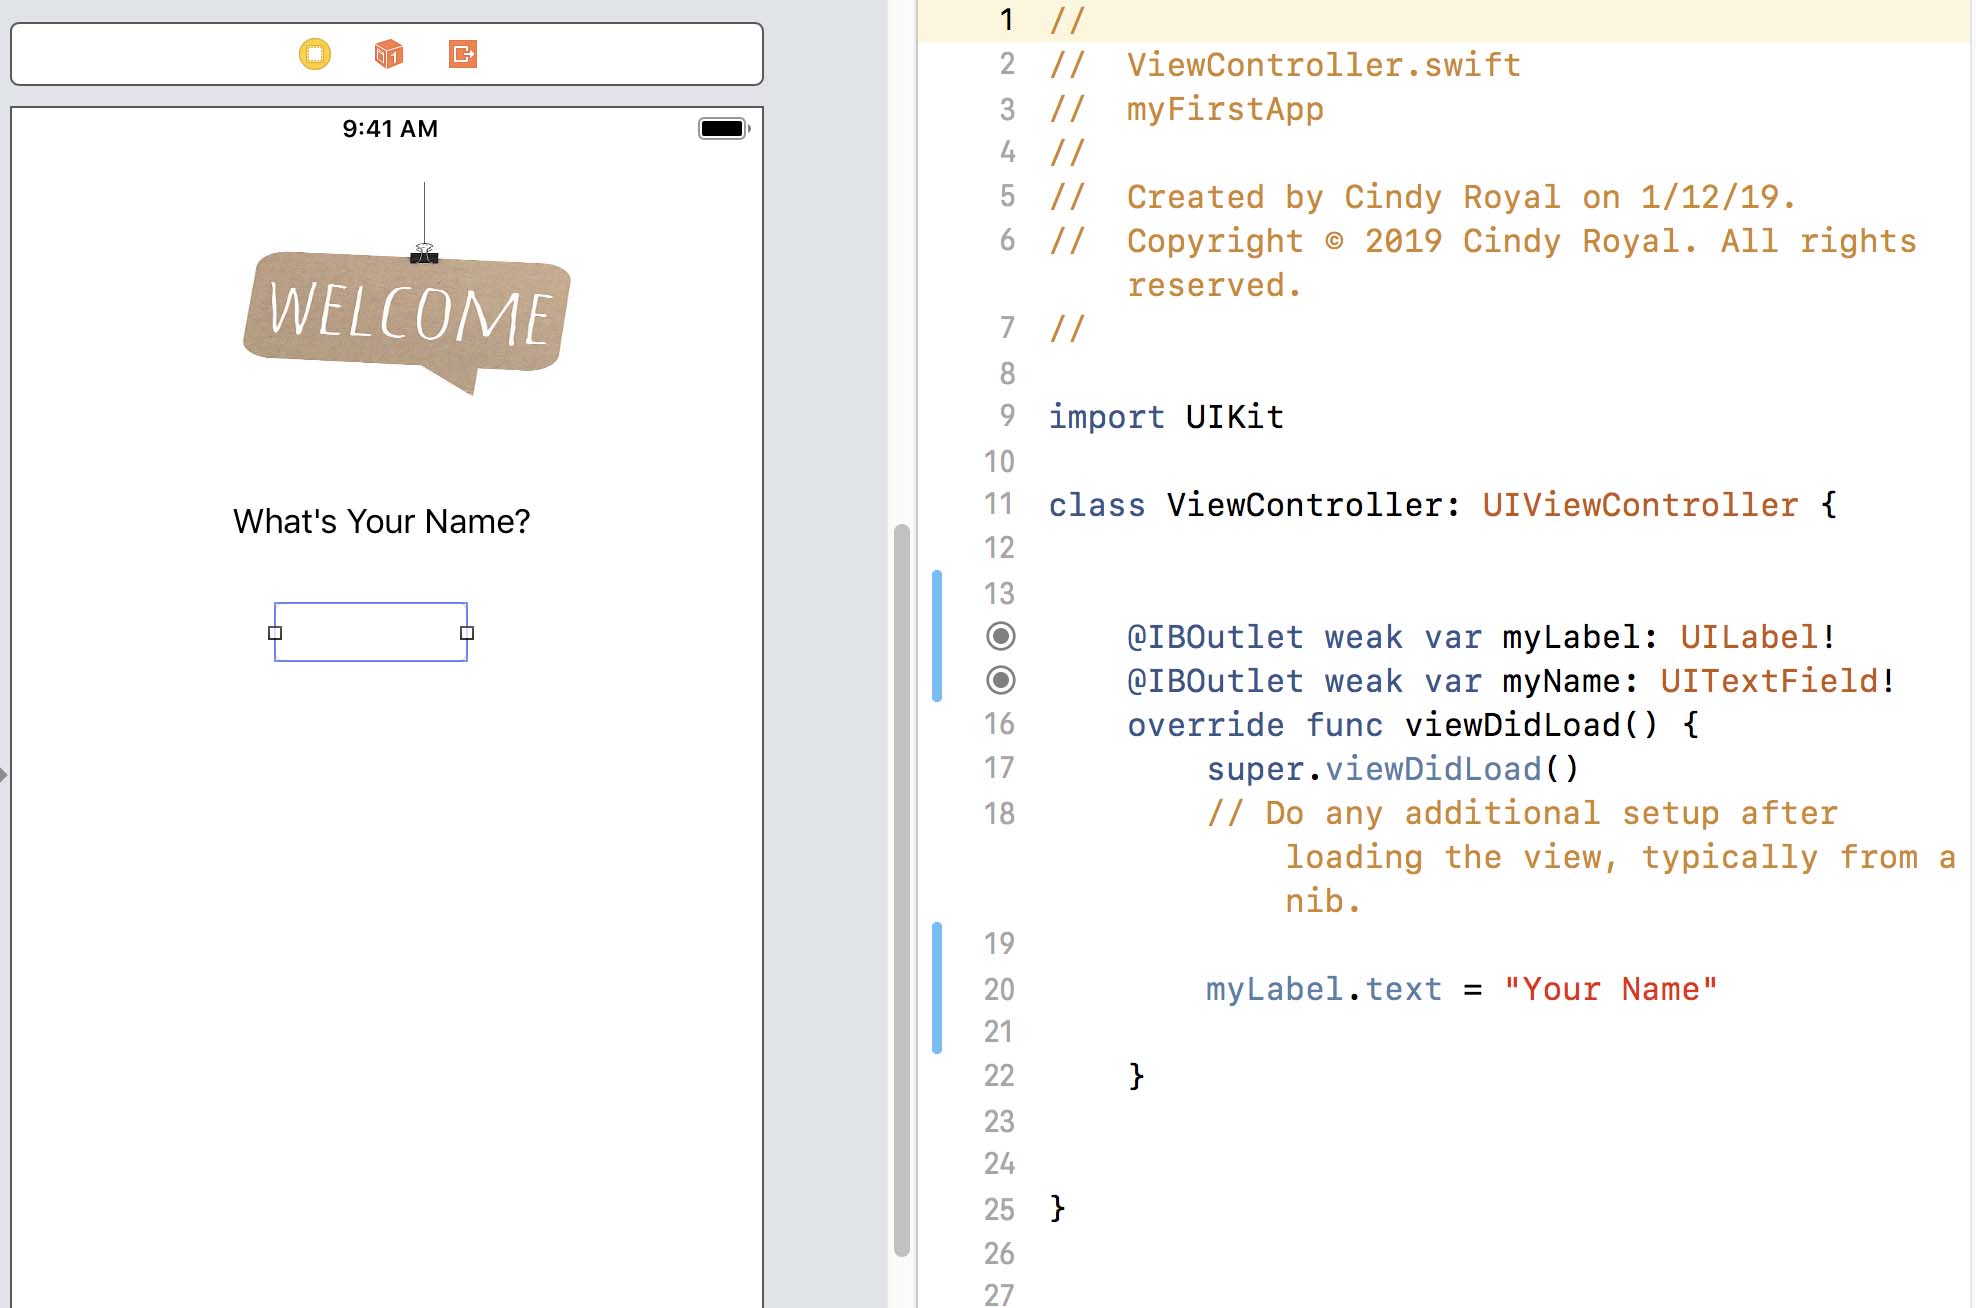
Accept User Input in a Text Field
Now we want to include a Text Field to allow the user to input their name. This is similar to a form element if you have created web forms in html. You need an element to capture a user’s input. Before we do this, use the // to comment out the code we put in to change the name in the viewDidLoad function, since we won't be using it anymore.
Search for a Text Field and drag it on the screen, below the label you created above. You can use the handles to stretch it to an appropriate size.
Connect the Text Field to the code with Right click (ctrl-click) and drag. Connect it below the Label. Call it myName. It is a type UITextField.
Add a Button
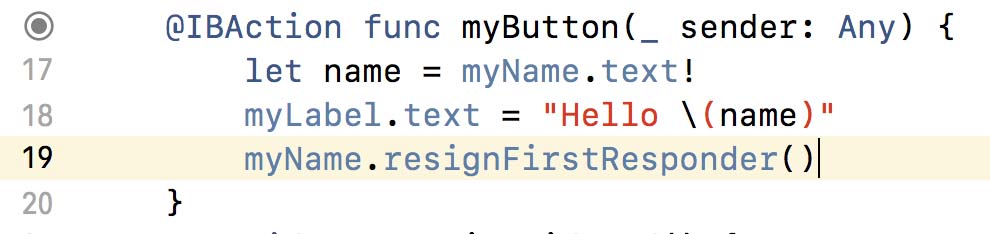
Now find a Button element in the Library. Drag it to the Storyboard. Change the text on the button to "Submit." Connect it to the Code (ctrl-drag) below the myName variable (with the ViewController class) and use Action, Any, Touch Up Inside, Sender for the options. Notice that this creates a function to run when this event happens. Name it myButton.
Find the code to the right. Within that function, paste the code. This will take the user’s input from the text field and change the label to the greeting, using the user’s input.
Notice that we used “let” instead of “var”. Both work. But since name is only used in scope in this method, it is optimized best as a let instead of a variable. We will use let and var at various points in the class. Change the text in the viewDidLoad function to say "Enter Name".
Run the app. Note that the keyboard comes up in the simulator. You can type in it with your mouse or you can type on the keyboard. However, once you start using your computer's keyboard, you have to close and open the Simulator again to see the keyboard function (or use Command + K to toggle keyboard).
If using the keyboard, you usually want to have it go away when the action is executed, so add the resignFirstResponder() line to your code to remove the keyboard on submit.
You have created your first bit of interactivity in mobile application! Let's explore a few additional types of input methods.
Code Sample - Coding a Button
Visual Interface
There are many things you can do to set up an interface. You can size elements. You can use the Utilities panel to the right to select text sizes, alignment and colors. For the "Enter Name" label, find the Utilities panel to the right. And click on the down facing arrow icon for the Attributes Inspector. Play with that label to design it the way you would like. Run the app each time to see your changes.
UI Elements
Switch
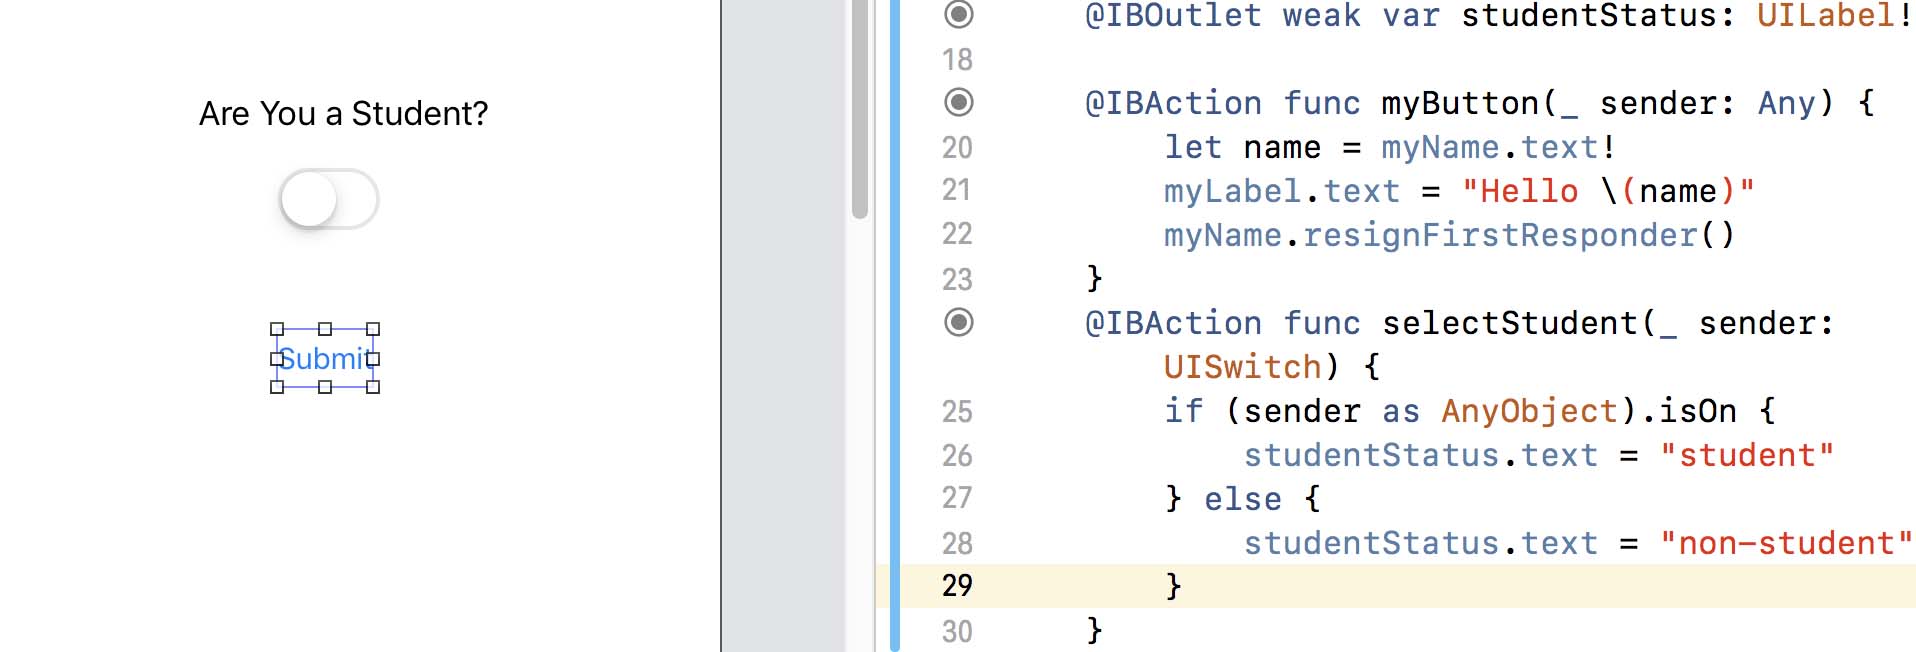
Let’s add a switch element to our screen. We’ll first add a label that will ask the person a yes or no question – Are you a student?
Drag a label to the screen and modify the text to say "Student?". Then connect the label to the code. We will use this as our question and also the label to hold the response. When you set up the Outlet, name it studentStatus.
Then search for a Switch in the Library. Make sure you are in the Main Storyboard view to be able to select Objects in the Library. Drag that to the screen. You can also add labels on the side so the user knows which to select. You can also select a default state in the Attributes Inspector (down arrow in Utilities area). Have it start as Off.
Use ctrl-click to drag from the Switch to your code. Make it an Action. Name it selectStudent. Find the code to the right and paste into the selectStudent function. When the user clicks, it will change the label above to student or non-student.
Test in the Simulator and see the value change when you click the Switch.
Slider
Now let’s see if we can capture a rating with a Slider. Maybe this is an app used to rate a course or a product.
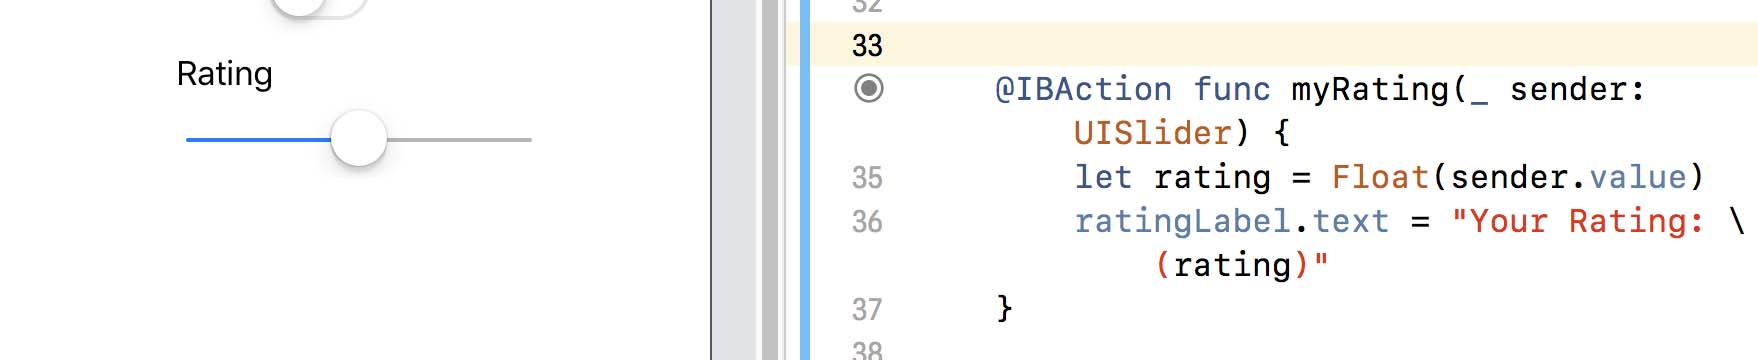
Find a Label and add it to the interface to hold the rating. Ctrl-click and drag to the code, name it ratingLabel. Give it some text to say "Rating."
Find a Slider in the Library. Drag that to the storyboard. In the Attributes Inspector (down arrow), you can see the value, min, max. Adjust those to be 3, 1, 5, so the most someone can rate is 5.
Ctl-click and drag from the slider to the code. This will be an action with type UISlider (don't leave this step out). Name it myRating.
Now, within that method, copy the code to the right and add it to evaluate the value of the item.
This code gets the value of the "sender" and puts in a "rating" variable. The we concatenate the text "Your Rating:" with the value from the slider.
You may need to stretch the Label and the Slider for the appropriate sizing.
Test the app along the way by running it in the Simulator. These lessons show how you can use Text Fields, Buttons, Switches and Sliders to programmatically change elements on the screen.
Connections
Now that you have finished the tutorial, click on each item and look at the Connection Inspector in the right panel (it is the last icon). There you can make sure you have the proper connection defined and delete any that were done in error. There is a tiny x for each connection that you can select to delete it.
Change the "Float" to "Int" in the first line to use whole numbers instead of decimals.
Moving On
Great job! That’s our first exercise. You have provided three different types of user inputs that we can use to create interactive applications.